Lock Down Distractions: P.O. Snoopy vs an Ugly Stik 049

200425-Ugly-Stick-049 (9)

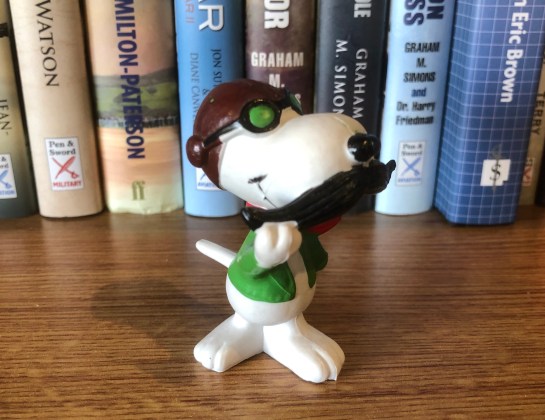
Pilot Officer Snoopy showing the world how to look groomed even when in Coronavirus lock-down.

Fighter ace pilot officer Snoopy needs a new plane to call his own! For such a figure stooped in doggy history nothing short of a WW1-esk war bird will do.  Now my little snoopy figurine is a little on the short side so it would have to be something small. I’ve always harboured a soft spot for the diminutive Cox engines so putting two and two together and a 1/2a sized model seemed the way to go.

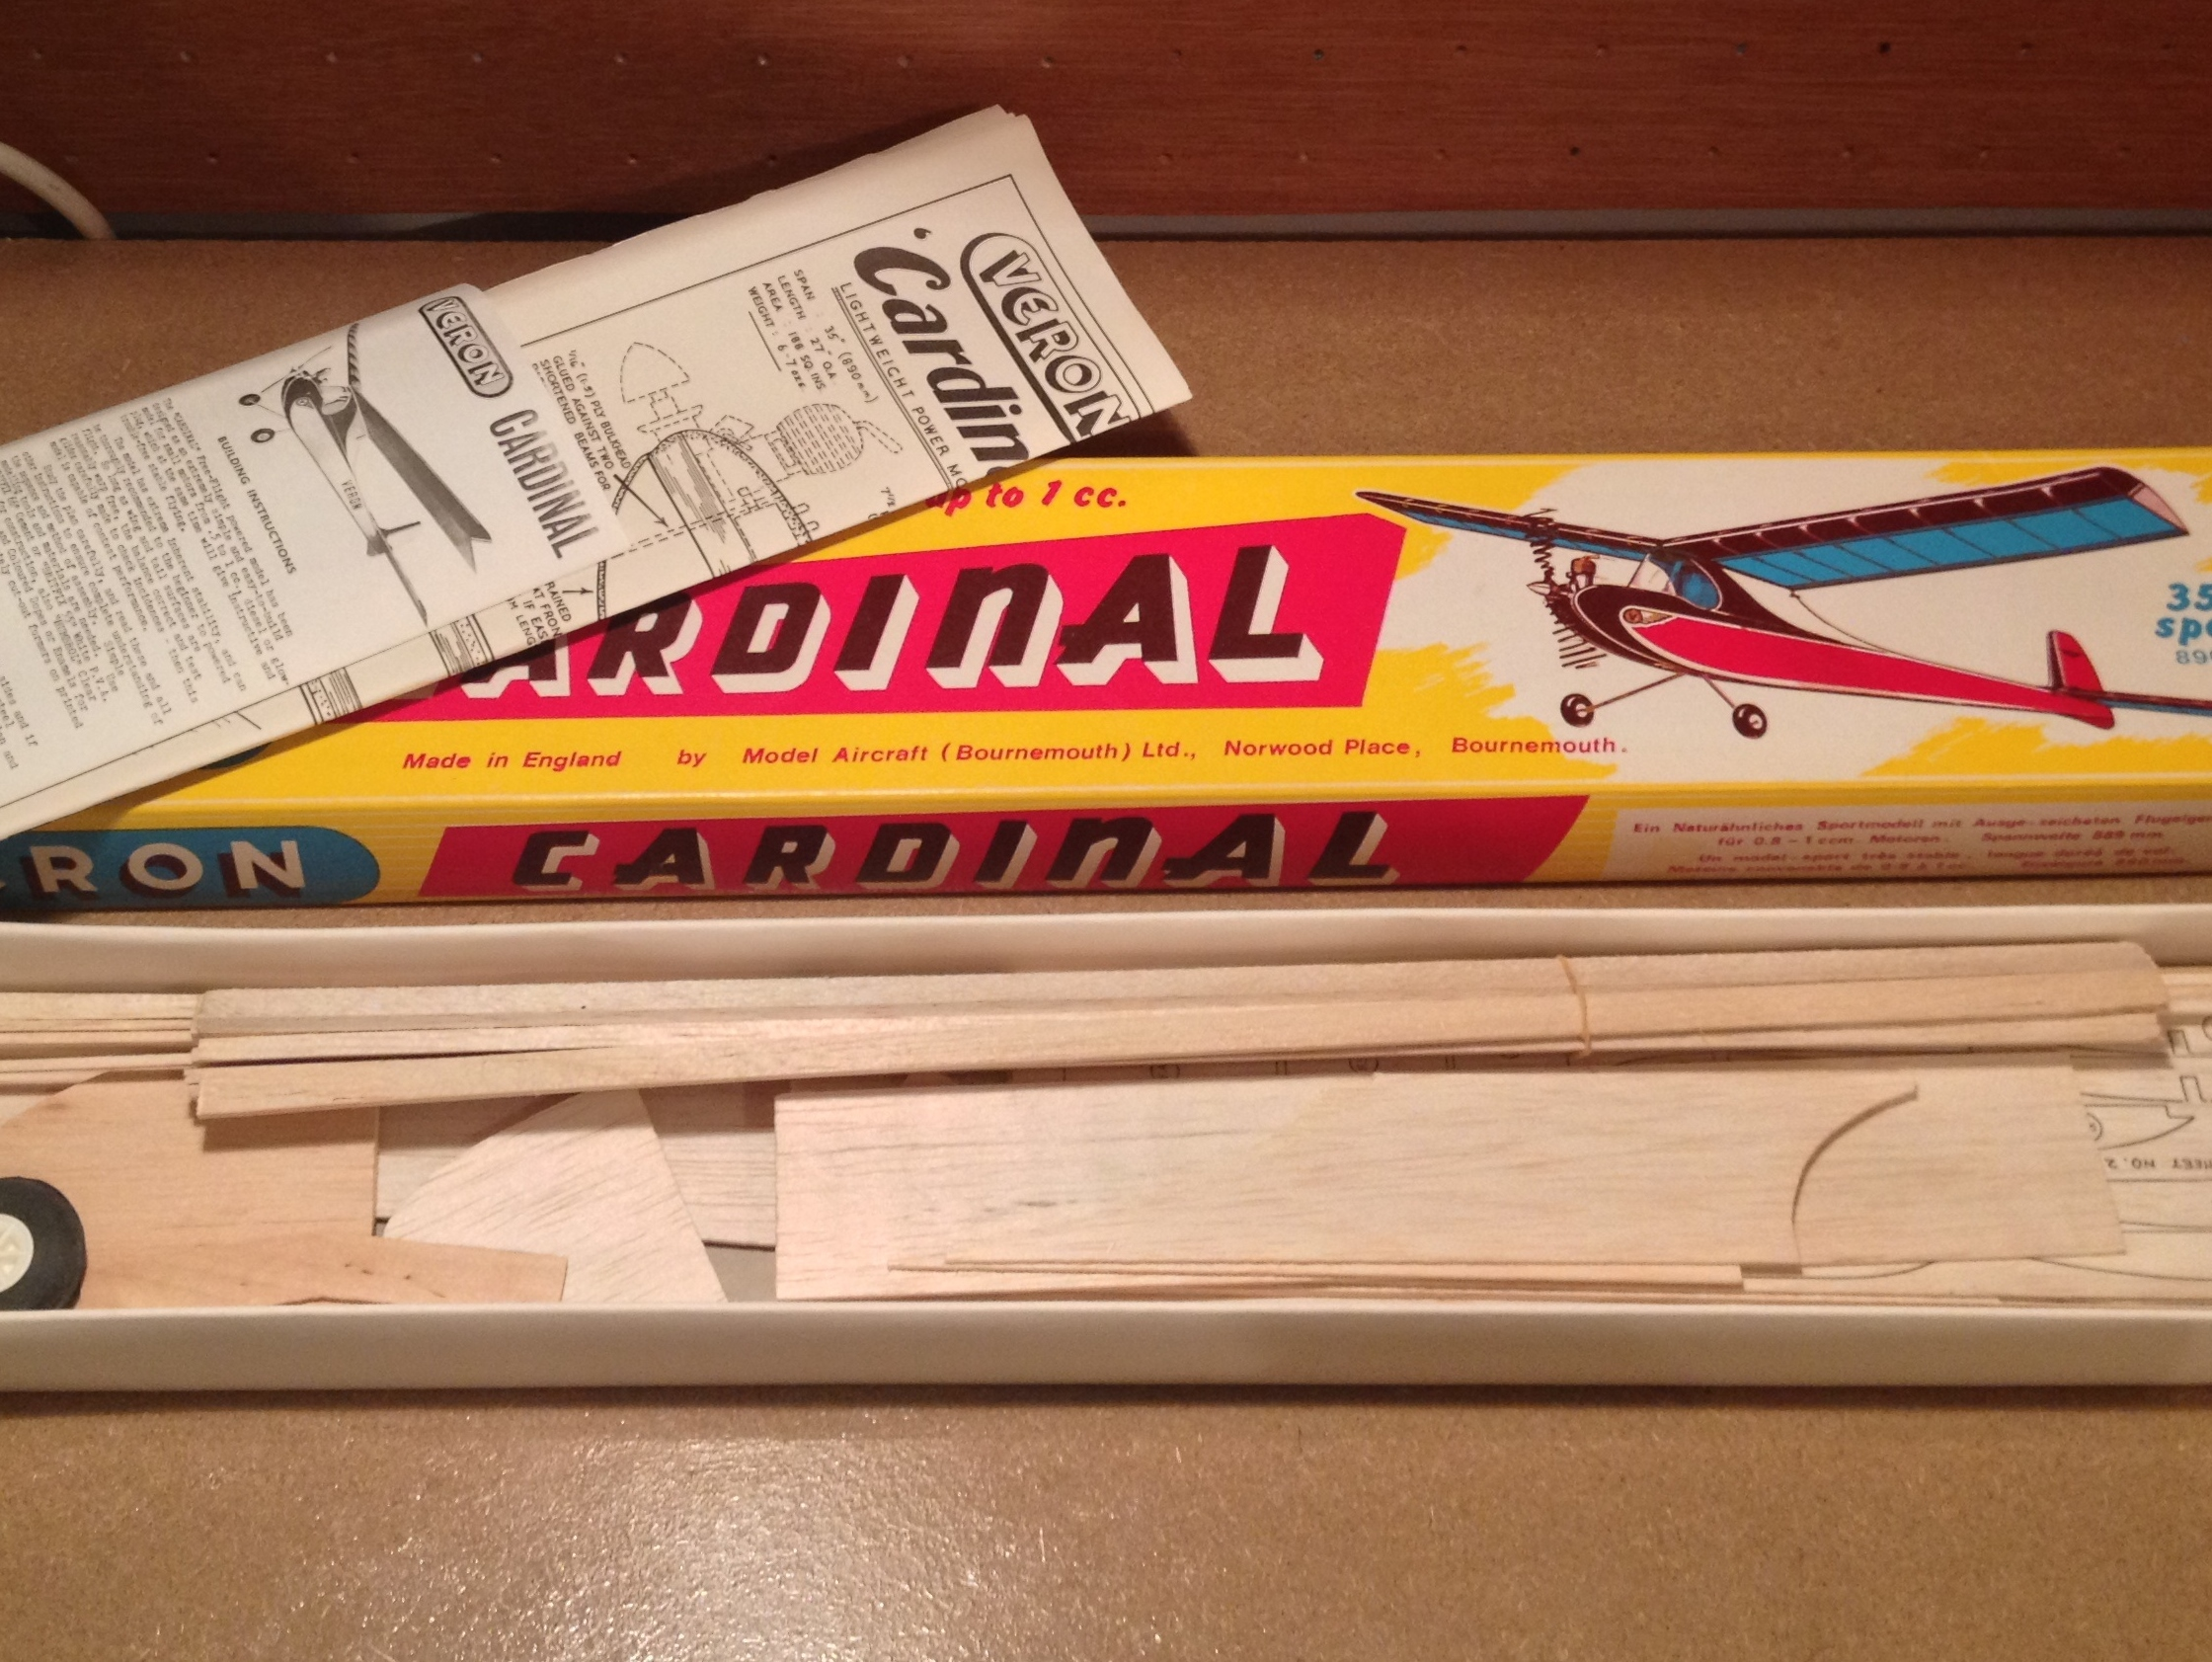
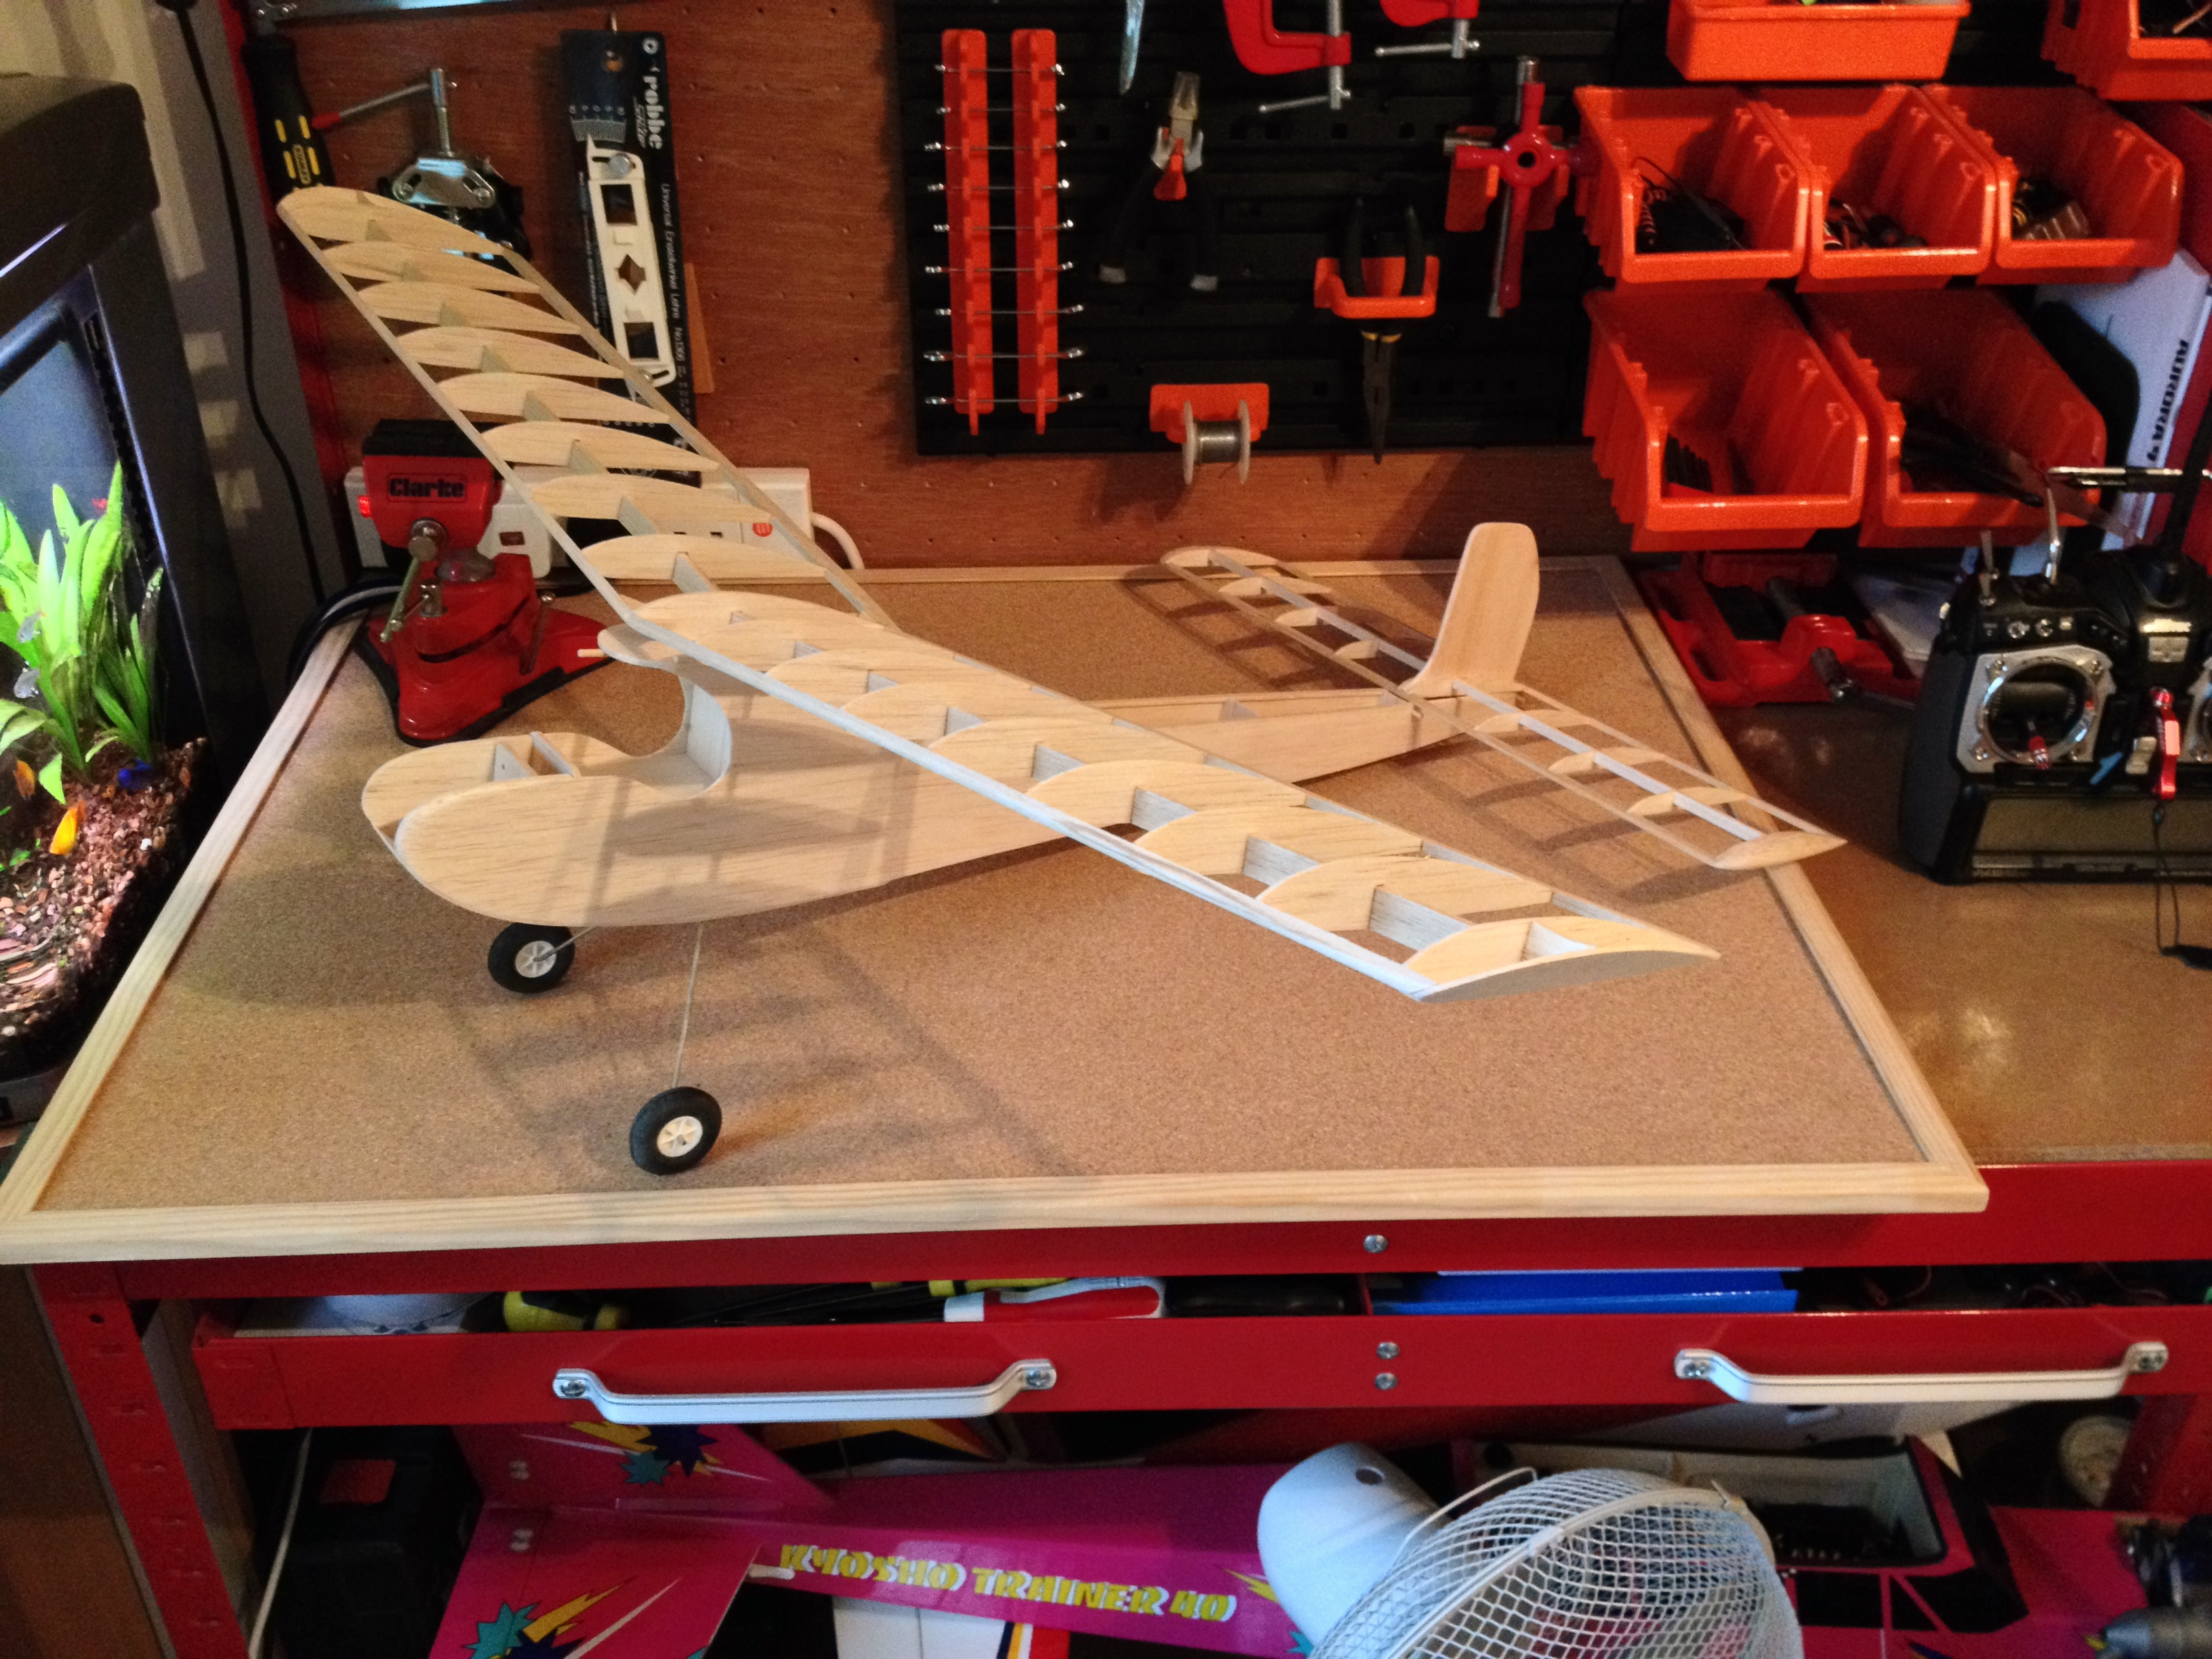
The Ugly Stik design is almost as old as radio-controlled model planes themselves and range in size from .020 thought to some true monsters. My kit was advertised on eBay and came jig assembled leaving a blank canvas (in the instructions!) for the modeller to decide on the engine and radio installation.

200425-Ugly-Stick-049 (1)

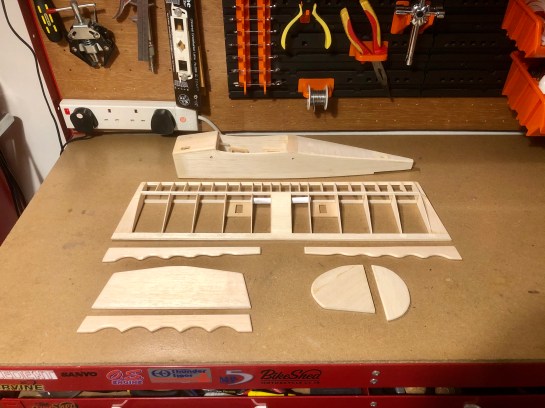
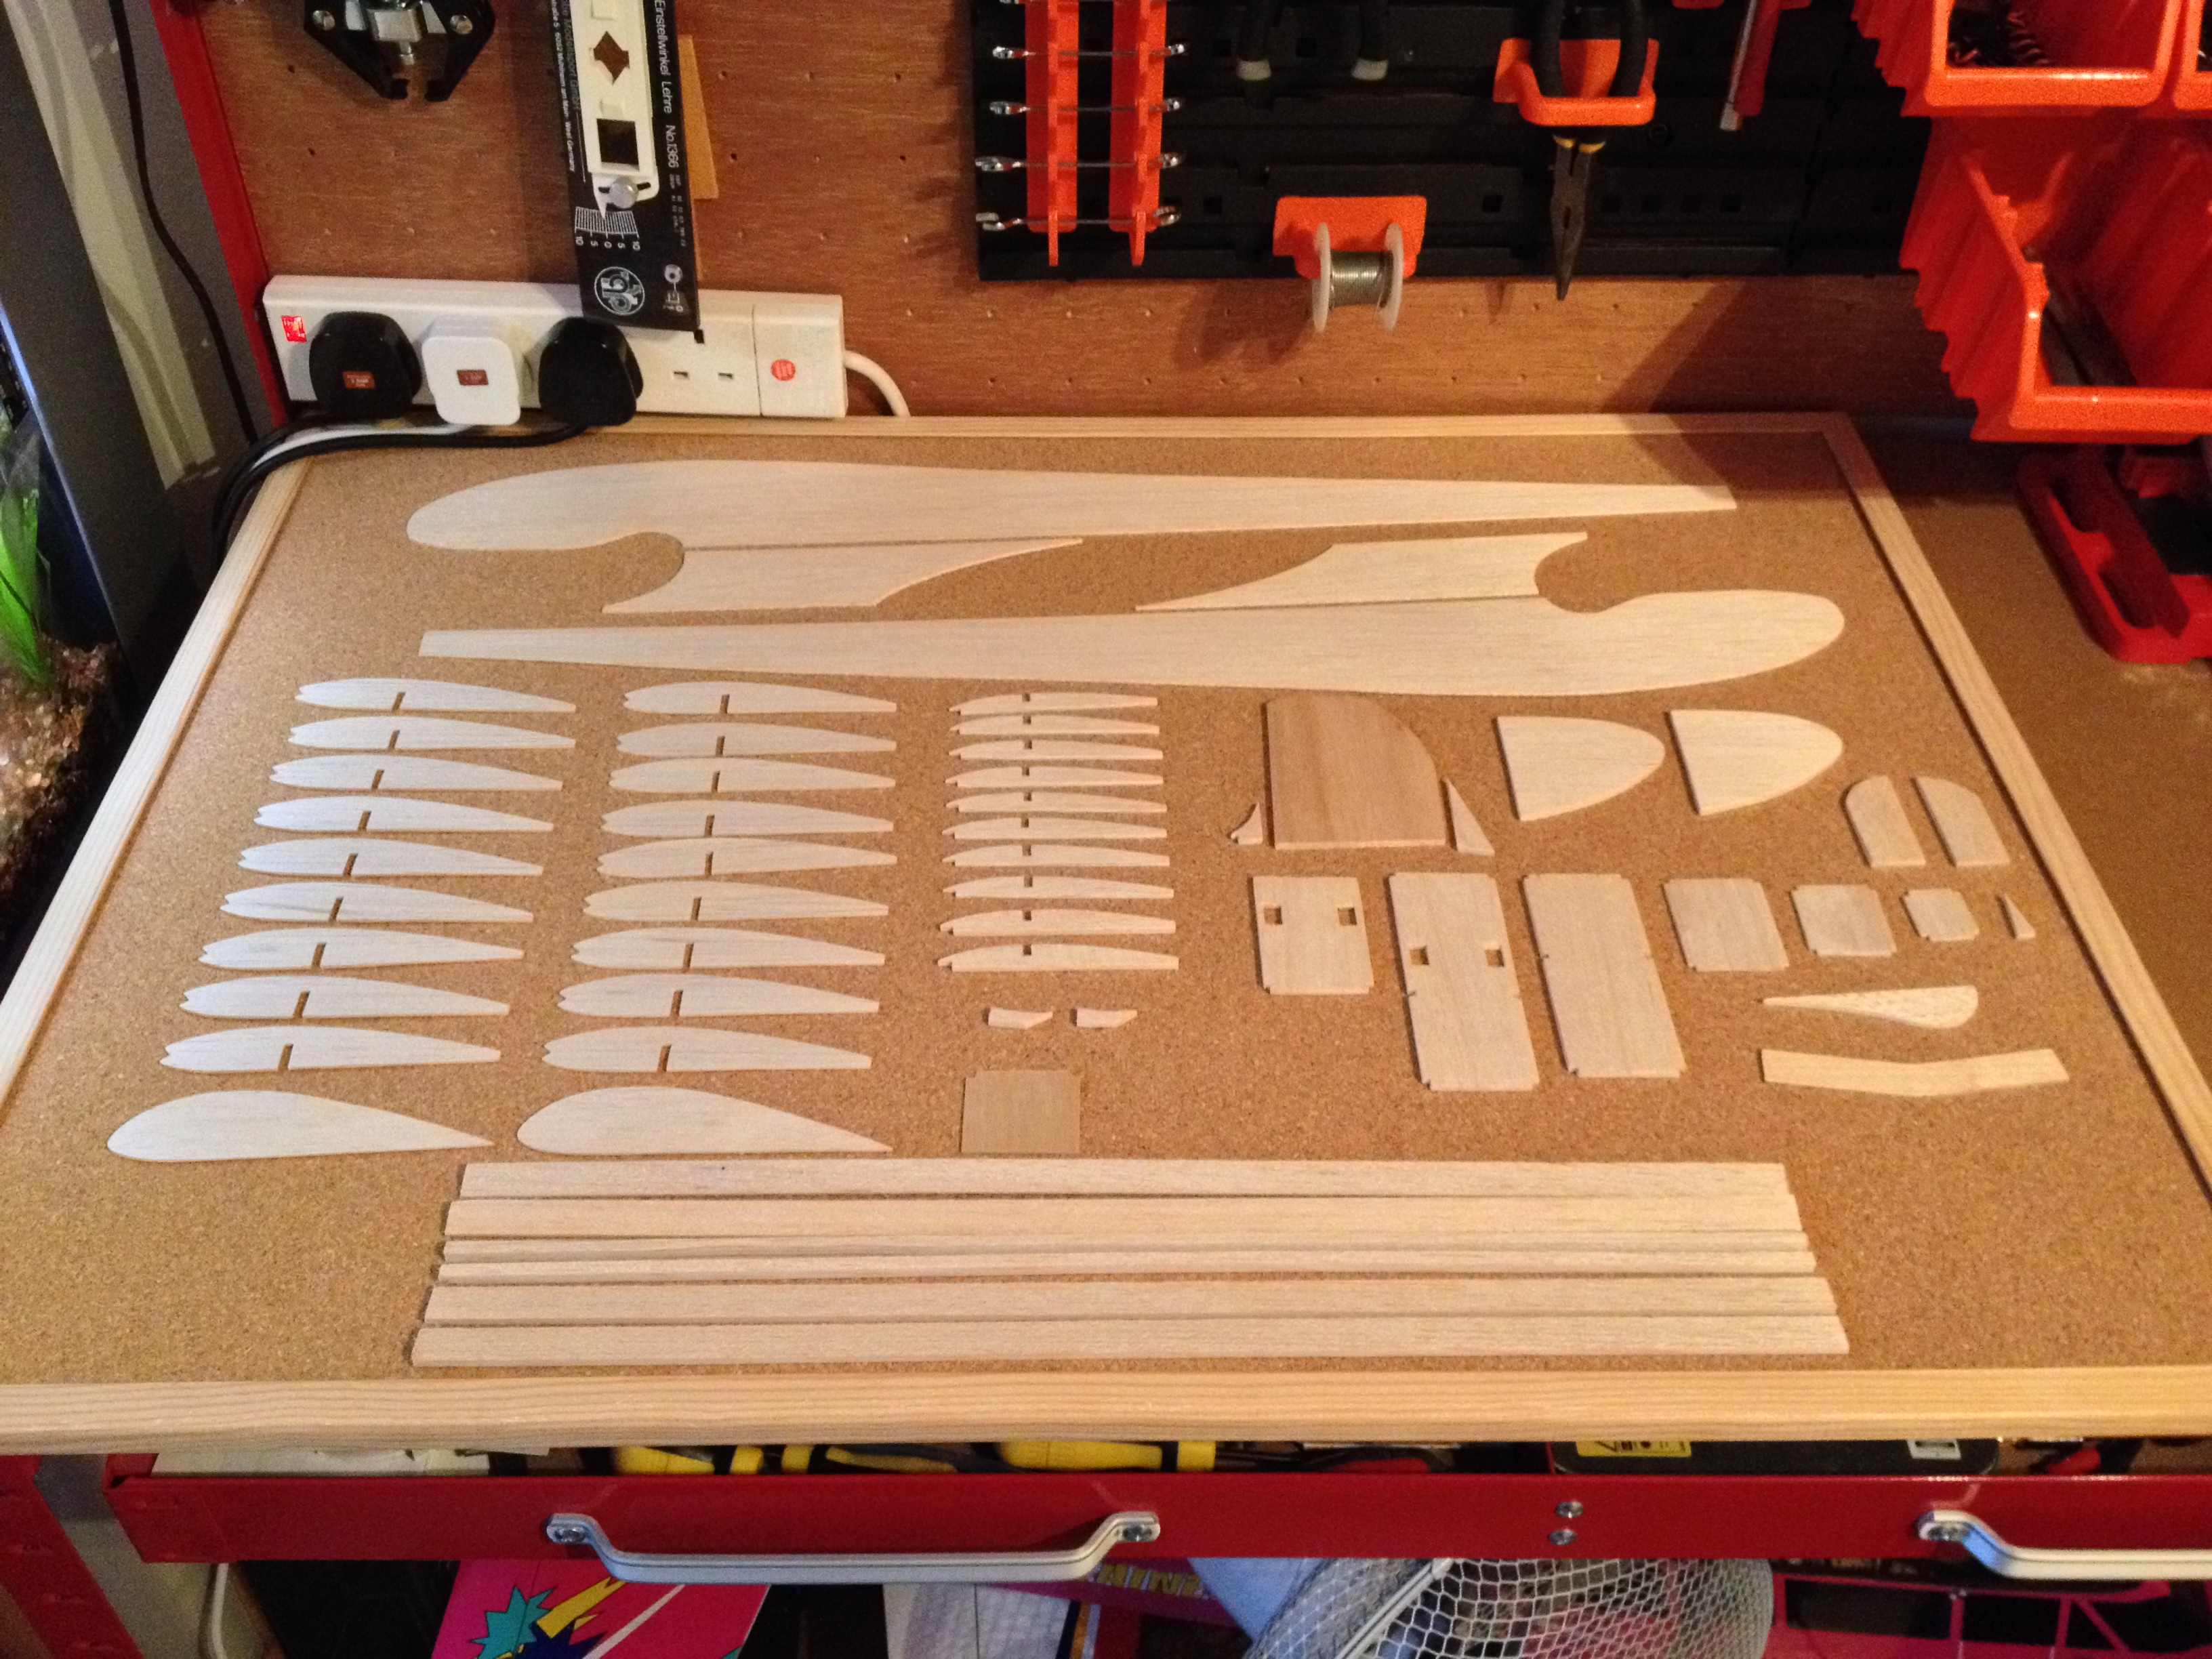
Components completed, sanded and ready for covering.

200425-Ugly-Stick-049 (3)

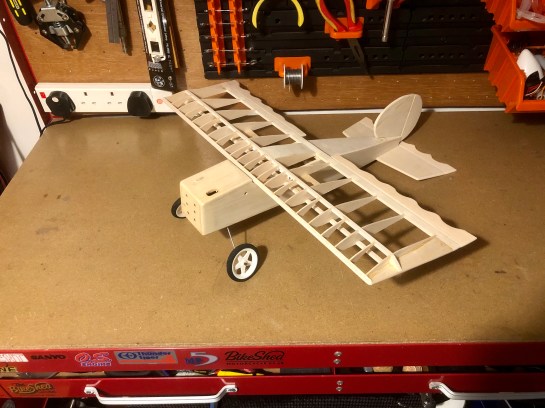
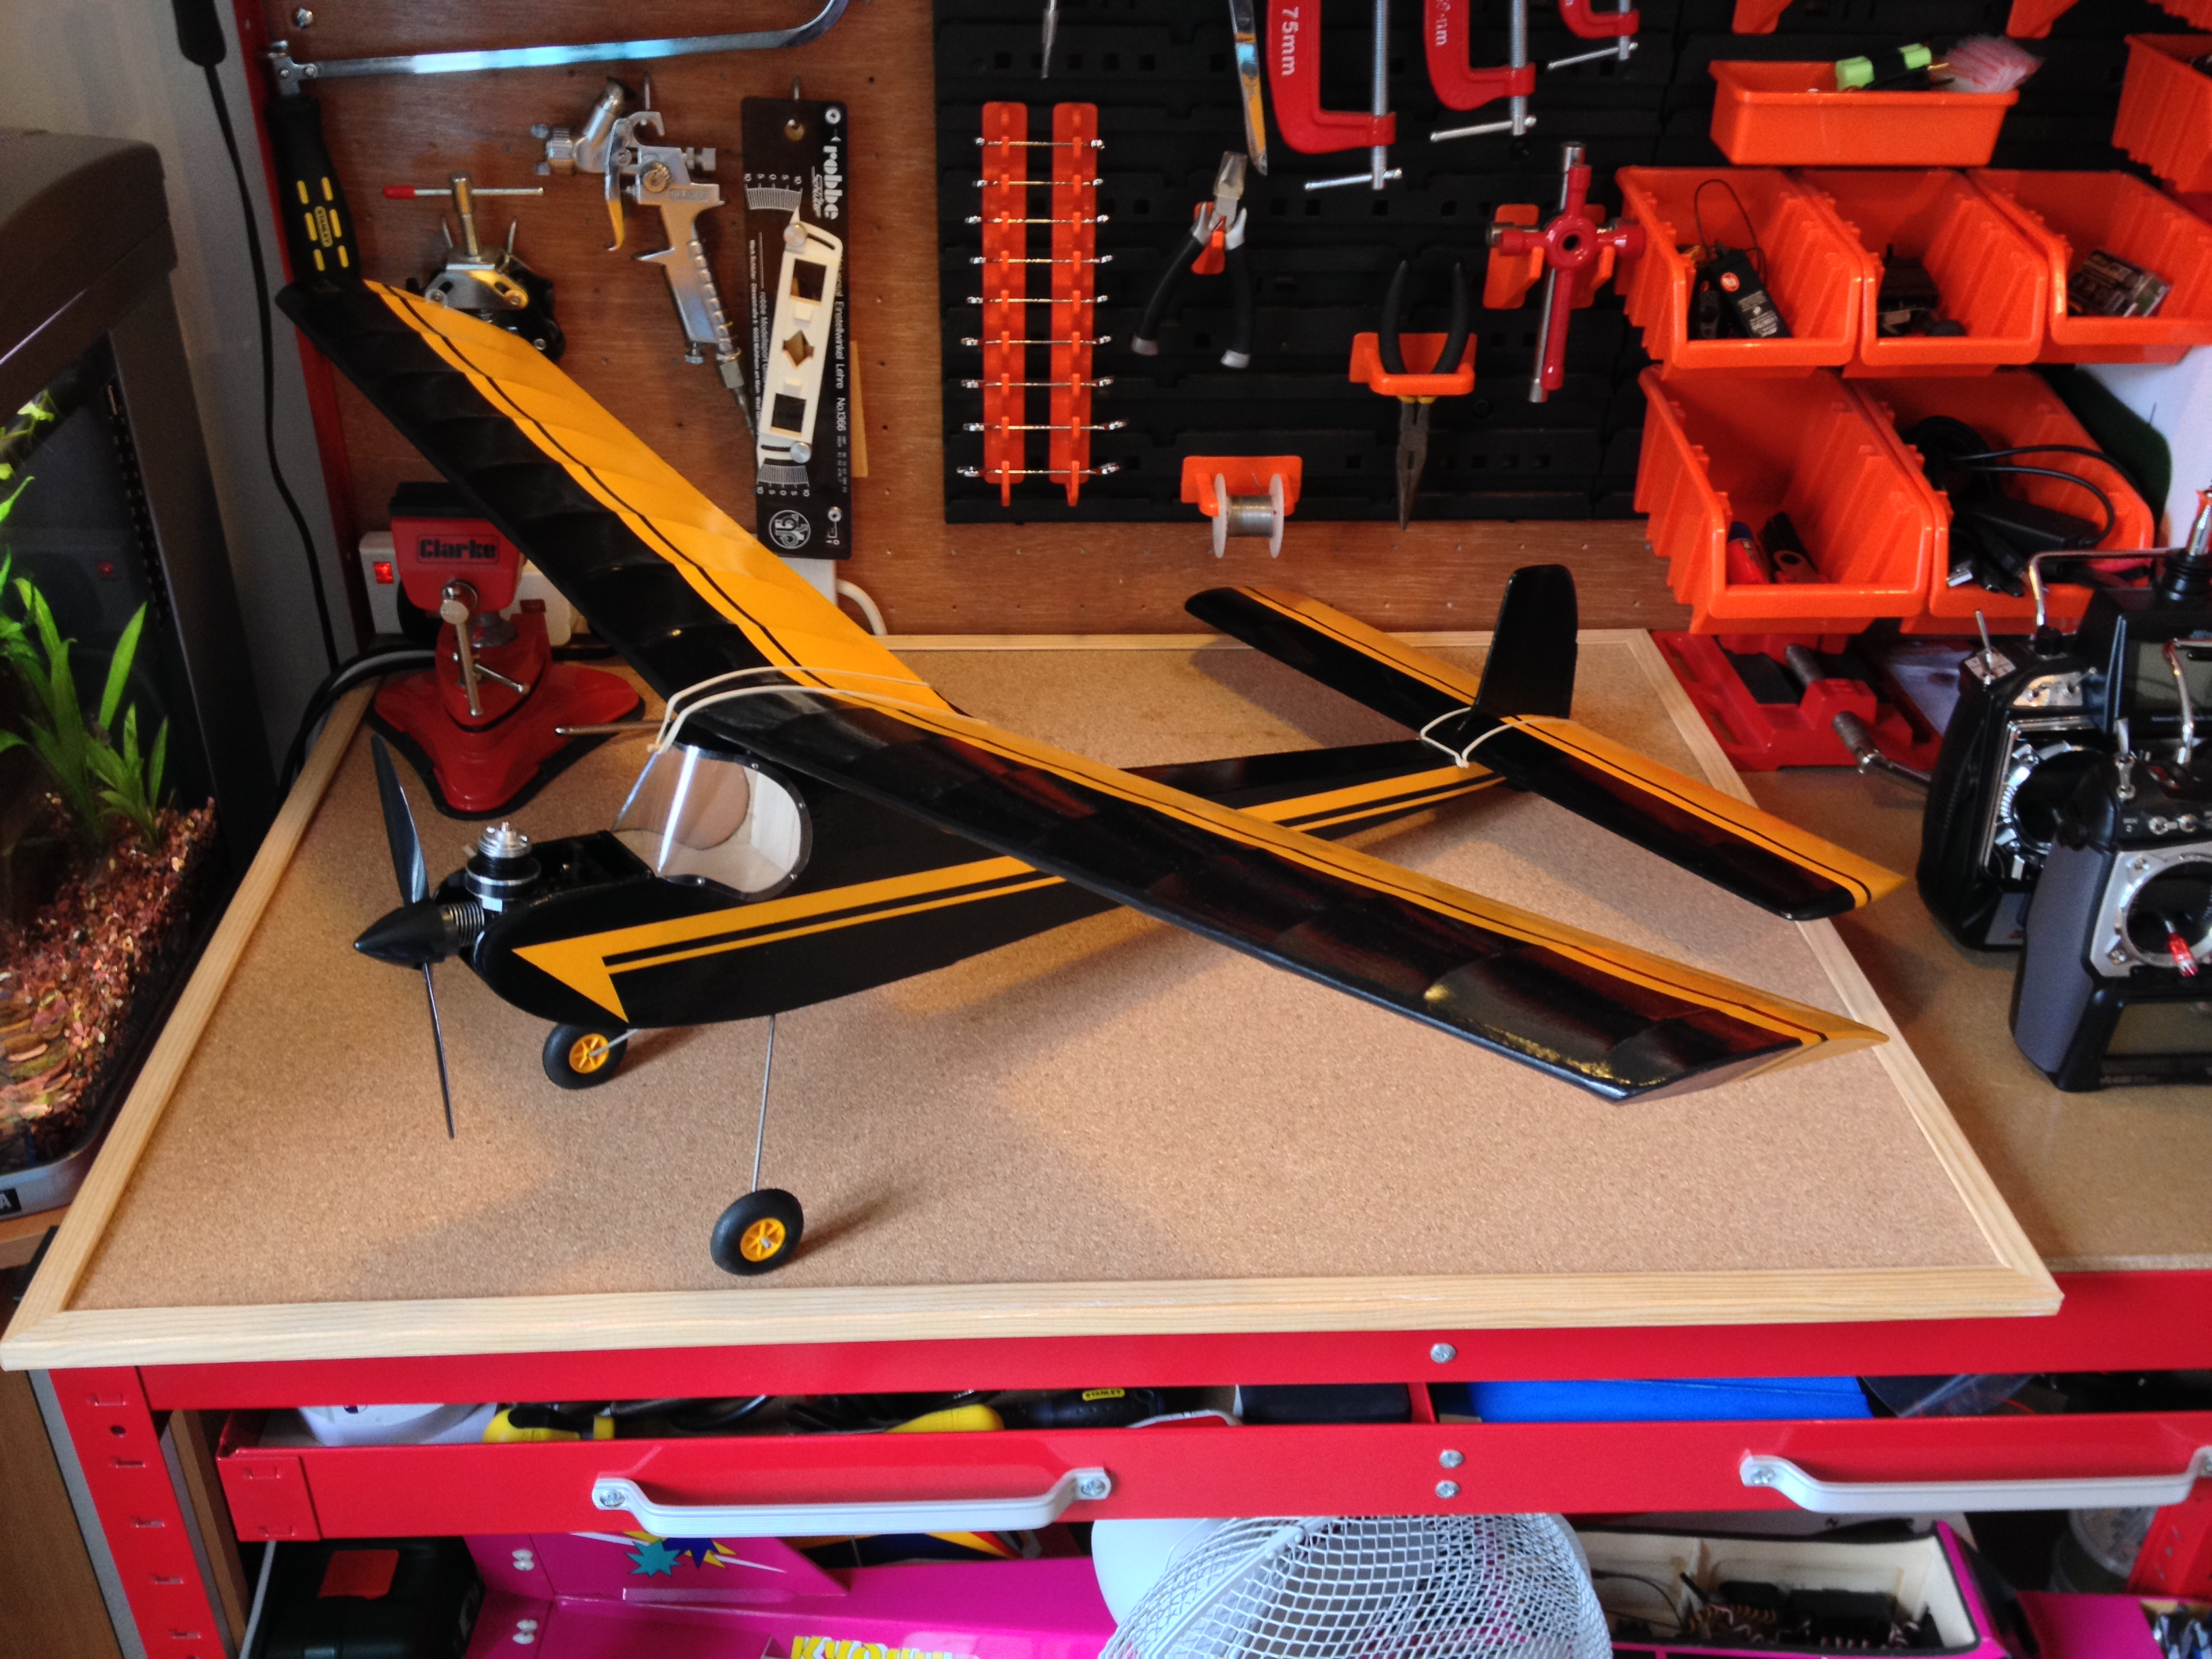
The scale wheels were the only accessories included in the kit but are a nice touch.
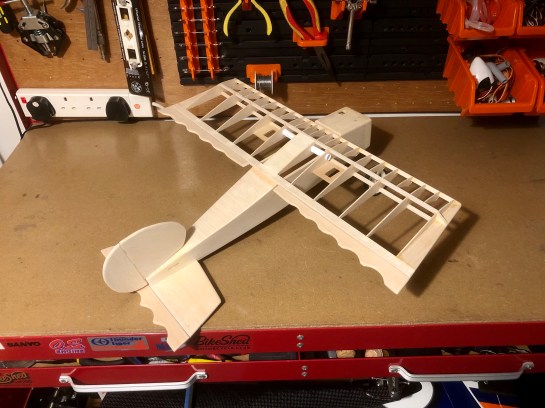
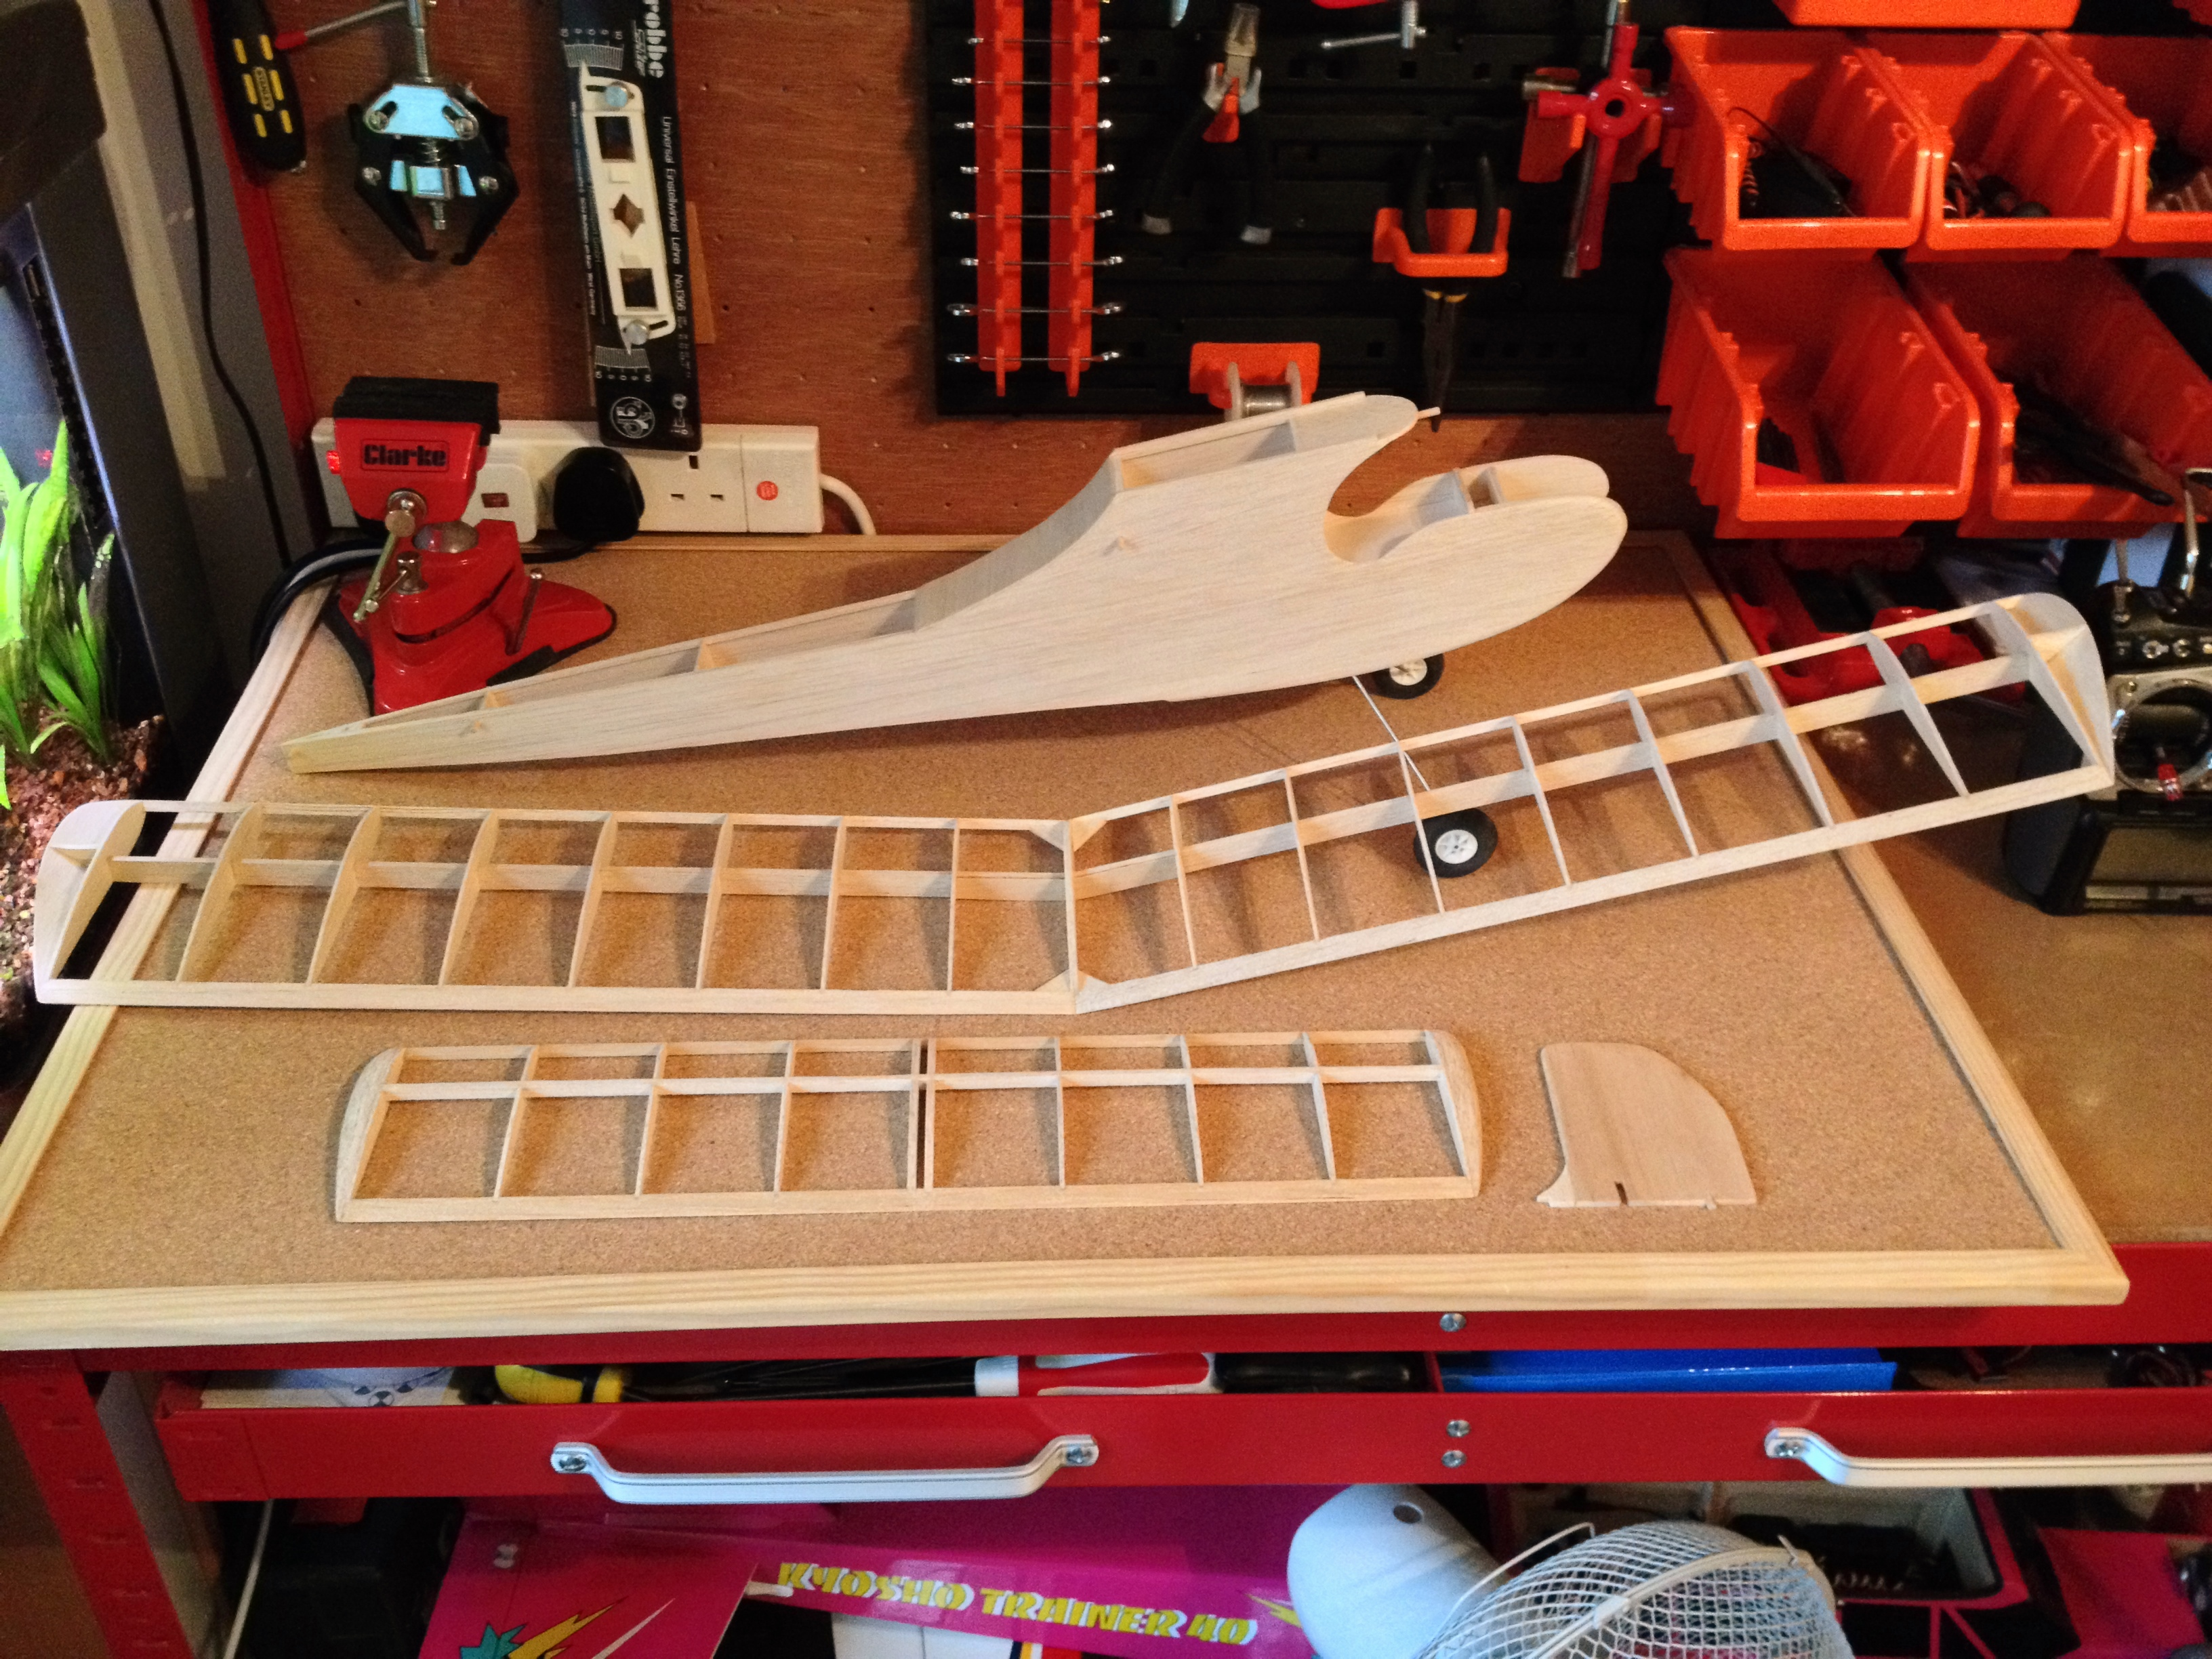
200425-Ugly-Stick-049 (2)

Dry assembly.

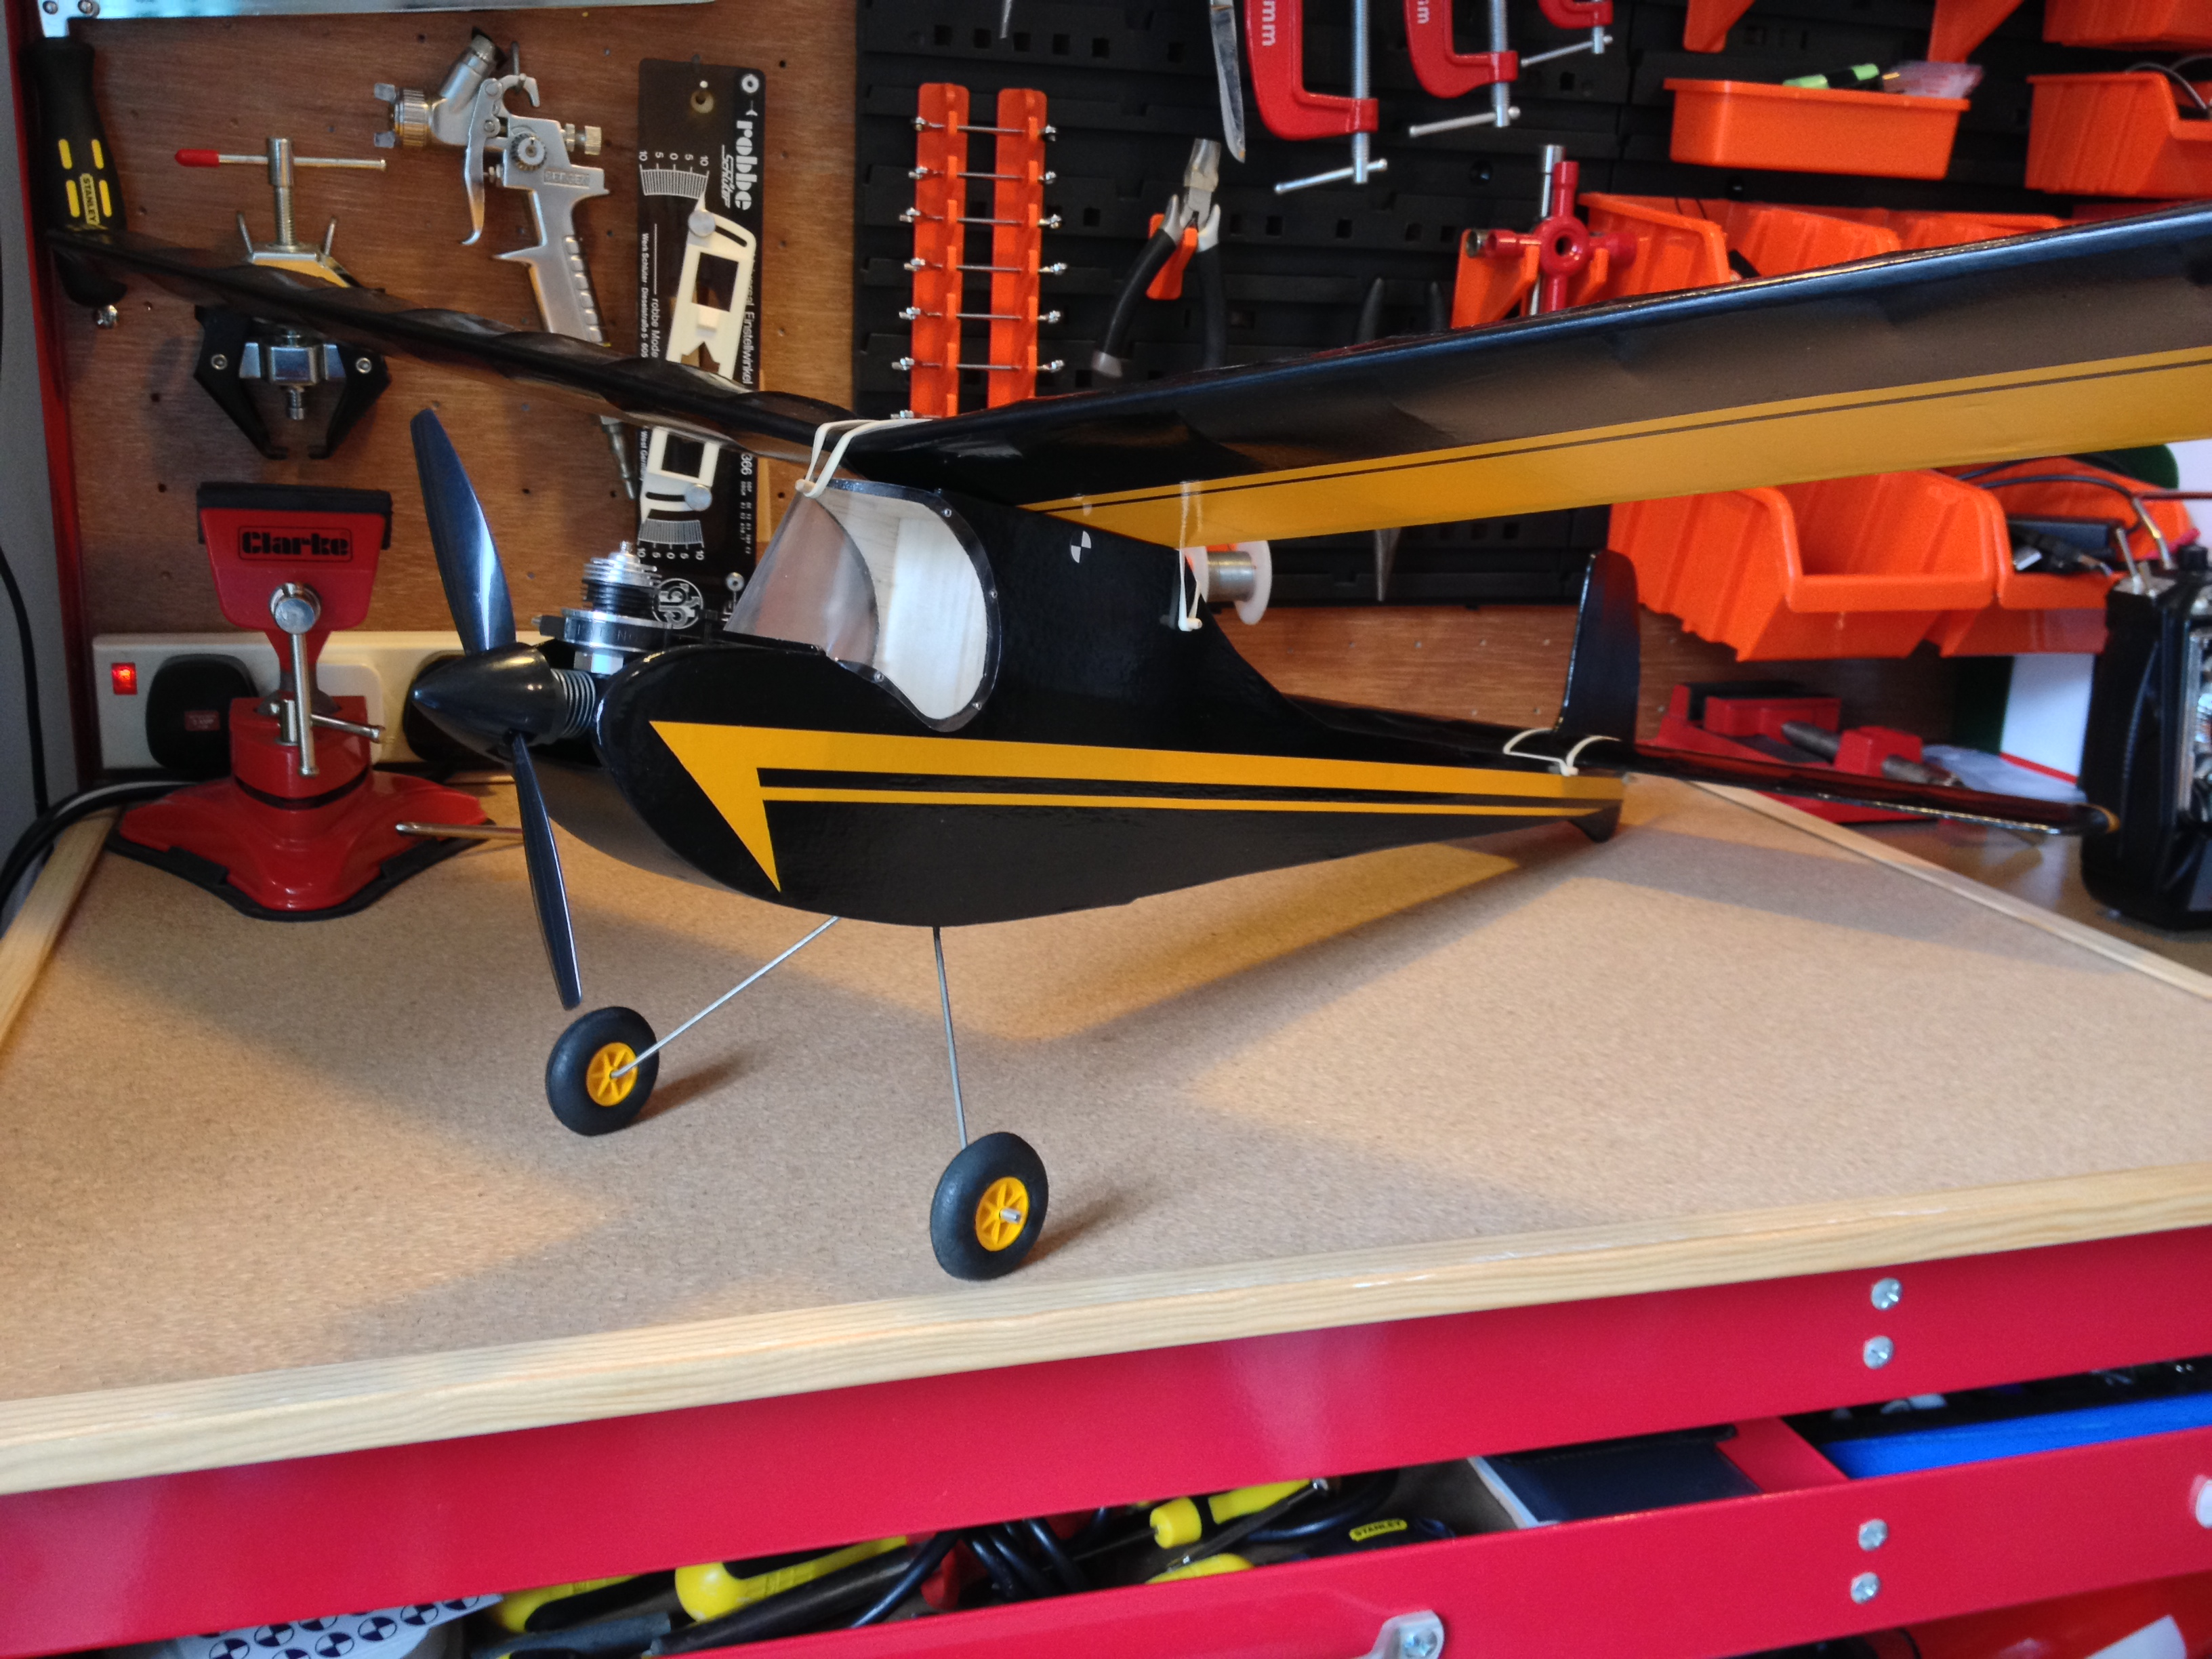
I made a few modifications by opting to fit a throttled Cox Cruiser .049 and added a rudder. I used wing mounted servos with paper tubes to carry the leads. Hitec HS65MG throughout on the flight controls. There is no room in the nose (being designed no doubt for cox engines with integral tanks) as the vertical undercariage block and wing dowel are in exactly the wrong places. Instead I squeezed a 2oz tank under the CG where it won’t impact flight performance as it empties. To offset the long fuel lines, I used an old free-flight trick of routing the tank breather in line with the prop-wash to gain some semblance of tank pressurisation.  Cox engines are upright creatures at heart but this should allow for longer vertical climbouts, slow rolls etc.

200425-Ugly-Stick-049 (6)

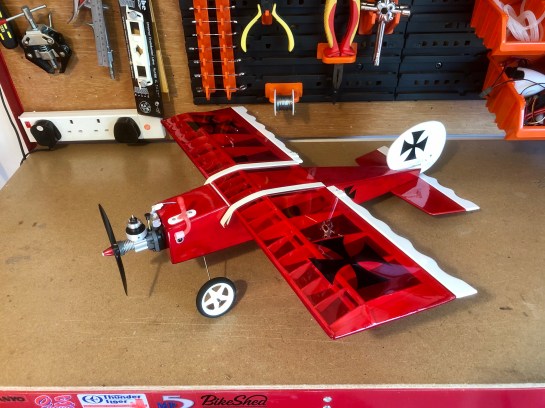
Small can be beautiful. Transparent red Solarfilm really makes the model stand out and imparts a lustrous shine on the solid wood fuselage. The black Maltese crosses were cut from Solartrim.

200425-Ugly-Stick-049 (7)

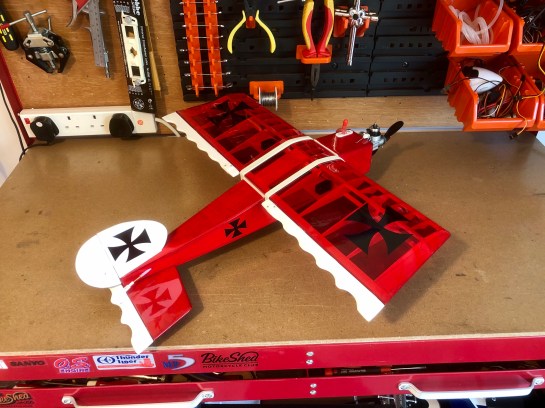
Final weight came to 450g. I’ve not exactly made any efforts to save weight so not to bad considering the metal geared servos, 2oz tank, 900mah battery pack and standard receiver. I fly from grass so prefer ruggedness over a slower stall.

200425-Ugly-Stick-049 (8)

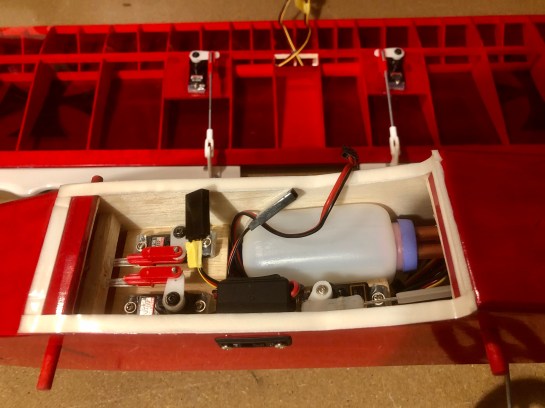
All neatly packed in.  I ran snakes to the rear control surfaces. Note that the servos are soft mounted using a piece of silicone fuel tubing.  Micro servos do not routinely come with grommits but never be tempted to hard mount micro servos in an IC model. In the background you can see how I installed the aileron servos.

200425-Ugly-Stick-049 (5)

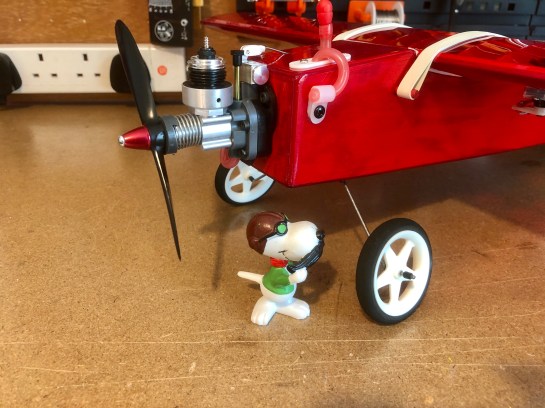
Standing proud next to his captured war prize; that grin says it all!  That cox Cruiser is a little gem of an engine.  I’ve equipped mine with a standard glow plug head and a silencer (well more goo director than effective noise canceller but it helps to keep things clean).  Note the breather pipe directed into the slip stream. 

The Ugly Stik is loosely based on the infamous Fokker Eindecker. It was a little early on the scene for the real Manfred von Richthofen to be associated with, but he did learn to fly on one after minimal tuition (he was an observer, not a pilot at the time). So, choosing to build an ‘Ugly Stick 049’ as Snoopy’s worthy new (captured!) stead is only bending history a little bit. Let’s hope snoopy has more luck on his first flight!

The Veron Cardinal; A First Flight Failure!

Veron Cardinal (C1) Finished (23.05.15)

I built my first Veron Cardinal back in 1993 when I was 11 years old. Having spent my pocket money on a succession of small Veron, Kiel Kraft and Guillow’s rubber powered aircraft I felt confident with the build and did not encounter any real problems.  In fact compared to some of the more complex and fiddly rubber powered stick-n-tissue WW2 fighters the cardinal seemed overly huge and very simple in design.  Instead, as my first engine powered model it was the noisy lump at the front, a Cox 049 Black Widow, that threw me. Once again, having picked a hobby several generations beyond my own and not having anyone to help me, I was faced with going it alone. Many hours of flicking the prop over in the garage on a test bench soon turned into days.  The fact that the engine in question was in the hands of at least its 7th owner and was a ratty old thing certainly didn’t help.  I was no closer to getting it running other than a few spluttering coughs when eventually things just ‘clicked’ into place, the garage was filled with fumes, and the poor engine was bolted into my shiny new Cardinal for the first flights.

Veron Cardinal Aeromodeller Dec 1951

The Cardinal is an old design by the late Phil Smith and first appeared on the market in 1951 under the trading name of Veron (named after Veronica; a wife of one of the company owners). Amerang purchased the rights to Veron from Model Aircraft (Bournemouth) Ltd when the latter folded in 1978 and kept production going for another few decades. By the end over 170,000 had been sold!

It was a cold but calm winter’s day and the whole family followed me out for this one. Test glides over, I managed to get my adrenalin under control and was amazed when the Black Widow burst into life first flick. Up I stood and threw the thing into the air with a joyful cry of triumph! I will never forget that flight. The cardinal soared magnificently out of my outstretched hand, tracking straight as a die with the winter sun glinting off its wings. Away it flew for all of 1 meter, stopped dead in the air and blew up!!

Glancing down at the scattered wreckage and trying not to listen to the hysterical laughter from my audience; I noticed the poor little engine, now separated from the front of the plane, was lying there still joined by the length of wire I’d forgotten to detach leading from its glow plug to the heavy starter battery……..

Back to the present day and I sourced the Cardinal portrayed on this page as an unbuilt kit from eBay at a not unreasonable £65. Now I know you can buy a brand new ‘Replikit’ version for £55, and included in that price are laser cut parts, but there is something nice about building an original.  This kit had been well looked after as the balsa was still soft but I personally cannot see the enjoyment in hoarding unbuilt vintage kits. After all, there gets a point when the wood is so brittle and the plan has turned to yellow flakes that it looks a mess. This sorry-looking state of affairs unfortunately coincides with the conclusion of that decision to horde in the first place. The result is an attempt to sell the kit on and get much less in return than expected. Many poor kits never get a chance to be built and probably never will as another ‘collector’ takes on the task of storage. Thankfully this particular kit has been ‘rescued’ by yours truly and put together as originally intended!

Veron Cardinal (26.11.12) (3)

Nothing beats opening the box on a kit to be faced with a feast of balsa goodness!

There really is not that much to building a Cardinal. After all the plane was designed for those new to the hobby. I built mine as per the plan with no modifications. The way the top tissue is uninterrupted from leading to trailing edge producing an exaggerated ribbed effect is one of the unique characteristics of the cardinal.  It seemed from my research on the net that many now add an extra top spar to aid with a two-tone tissue-only covering scheme, or an overly strengthened centre section.  In my opinion both ruin the wings pleasing lines.  If built well, and that means not missing out those all-important gussets, the wing is sufficiently strong enough to cope with most ‘free-flight’ scenarios. With the wing holding bands meeting in the middle above the canopy there is no risk of crumpling the tissue as many seem to fear.

Veron Cardinal (A) Parts Cut Out (25.04.14)

Parts all cut out and ready for some glue

Veron Cardinal (B) Frames Completed (13.05.14)

Panels completed – note the all important wing gussets on the centre ribs

Veron Cardinal (B1) Frames Completed (13.05.14)

Dry Assembly

Veron Cardinal (B1) Tissue Covering Completed (30.05.14)

Covered in tissue. Thinned down Deluxe Materials Eze-dope was used to both affix and shrink the tissue.

Colour has been added to mine, adopting a yellow and black scheme, with 3 coats of thinned down Revell water based acrylics applied by brush. It’s a technique that I’ve used with a lot of success and creates little mess. The black was painted onto masked-off yellow and the entire model was finished in Flair gloss fuel-proofer. A nice shiny re-built Cox Black Widow, represent with a now obligatory eco-conscious silencer, completed the front end.  The max target weight without engine is quoted as 200 grams and the Black Widow weighs in at 65 g minus silcener/prop/spinner.  Overall mine comes in at a very healthy 265 g including nose ballast, prop, wheels etc showing how water based acylics are the way to go!

Veron Cardinal (C) Finished (23.05.14)

All ready to go. My kit came with original Veron wheels with removable rubber tyres so painting the hubs was easy.  As a simple finishing touch these really bring the model to life.

Veron Cardinal (C4) Finished (23.05.15)

Reconditioned Cox Black Window looking right at home in the engine bay.   5 g of lead ballast is tucked away under the engine giving an all up dry weight of 265 g.


This slideshow requires JavaScript.